

What Is A Good Size For Mpcnc
We're building a MPCNC! Y'all can notice the parts I used listed below, too every bit the build videos and livestreams. As the build goes on, this page will get updated!
Parts used
Printed parts
For the project I printed the official parts from V1 Technology, but I've since learned that there are substitute customs versions available that make metric hardware much more usable. Afterward having built with the official parts, I can highly recommend not using them and press the modified versions instead. (Baronial 2019)
If you don't take admission to a 3D printer, you can as well order the parts through V1 Engineering. Merely it'south more fun to print them yourself!
Non-printed parts
| Office | Role | Qty | Available from: | |
| Duet 2 WiFi | Mainboard | one | Duet3d | Matterhackers |
| MKS Gen 1.4 (set with A4988) | Mainboard (alternative) | 1 | Aliexpress | |
| NEMA17 | Stepper motors | five | Amazon | Aliexpress |
| Coupler 5x8mm | Leadscrew coupler | 1 | Amazon | Aliexpress |
| GT2-2M 16T pulley | Belt pulley (5mm bore) | 2 | Amazon | Aliexpress |
| GT2-2M 6mm belt | XY chugalug (sets with pulleys available) | 5m | Amazon | Aliexpress |
| Longer wiring set (optional) | Motor wire (etc) extension. Match to motor and board connector. | 1 | Aliexpress (motor cables) Aliexpress (generic 3DP wiring sets) | |
| Power supply | Electronics / steppersupply (24V 2A preferred, 12V 5A besides works) | i | Amazon | Aliexpress |
| 400W / 500W Brushless spindle set | Milling motor with speed control & ability supply | i | Aliexpress | |
| 608 bearings (608-2RS recommended) | Used as linear bearings. | 53 (frequently sold as ten- or 12-packs) | Amazon | Aliexpress |
| Base plate | 1 | Local | ||
| 25x2mm tubing | Frame, linear rails | Use the calculator | Amazon | |
| 3/4″ GRT conduit tubing | U.s.a. culling tubing | Local |
Screws and fasteners (list at V1 applied science) are available through sources like Amazon, but I've found it's much easier to find a specialized store that carries everything in a consistent quality.
Conclusion
Alright, I got this MPCNC built, it moves, information technology cuts, you were able to follow the entire build process live hither on YouTube. Last week, I was out filming a few projection and when I got dorsum, I wanted to actually tune this matter in and get information technology to cutting well. Because what we were seeing on the terminal livestream was that there was an enormous corporeality of churr and but bouncyness in the toolhead, especially in the aluminum cut, only also already in MDF, I know even from flimsier machines, that shouldn't exist that fashion, but somehow, this machine was just not rigid enough to mill into the material. And aye, I did build this one slightly larger than they normally are, but what I was noticing was that the belt and the way the chugalug was mounted introduced a lot of flex into the drive system. Like, I could easily stretch the entire belt assembly by a millimeter or two, even with the zip tie as tight tight equally possible. Now, in the comments, you lot guys have already suggest a bunch of different areas where my machine could as well have problems, like these long M8 bolts that are used in the carriage having a smooth shaft instead of being threaded all the way through, which could have the wagon flex more than than usual, but I wanted to go footstep by step, set up the obvious issues with my machine outset and attempt and sympathise the MPCNC a flake more than during all that. And I idea information technology would a expert kickoff and an like shooting fish in a barrel gear up for the belt with a new printed role that would directly clamp the chugalug with no zip ties. But it wasn't that like shooting fish in a barrel.
While I was already drawing a new part, I wanted to go ahead and work on a few other challenges that I ran into during the build, like the fact that there are only a handful size options available for tubing, none of which are really every bit cheaply available here equally metal conduit is in the United states of america, the fact that almost none of the nut traps were grabbing the lock basics properly and I'd had to jam a screwdriver in in that location to agree them, and a few of the parts only seem to be made for imperial-sized hardware from the start, not metric.
So I started in Fusion 360, created a new parametric blueprint and drew upwards the first role, one of these corner pieces with adjustable wall thickness, screw size, rod diameter, and, of grade, it has the chugalug just pushed in sideways with no zip ties or annihilation. Worked great, so I tweeted almost information technology, was like, hey I created this part, if anyone wants to employ it, hither's the Fusion360 design, I'grand sharing this equally Creative Commons 0 aka public domain, impress it, alter it, include it in your project, you don't even have to give credit for it, basically, do whatever you desire with it. And here's where it got complicated. Because Ryan of V1 Applied science, he designed the the original MPCNC parts, came in and was like, "Hey Tom, you can't actually release these parts every bit public domain, they're a derivative work of my original parts, and then y'all need to release them equally Creative Commons Attribution Not-commercial."
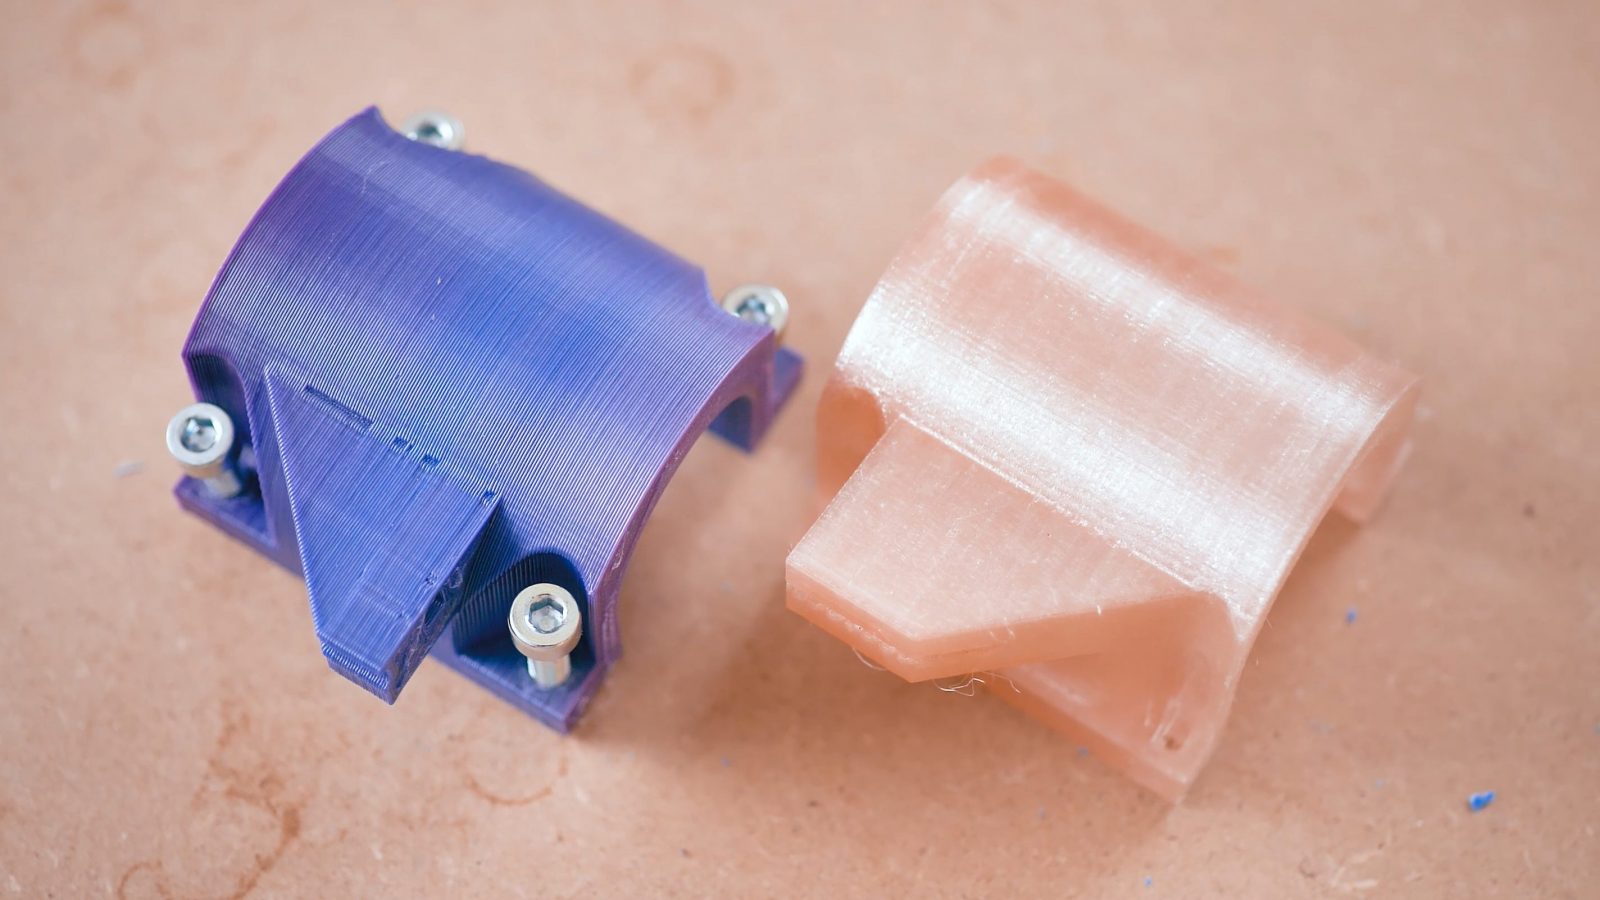
Now, merely to be clear, I didn't simply import the original stls into Fusion, chop off the zip tie brace and add the belt slot, this office is designed from the ground upwardly. I spent a couple hours on the design to work out kinks with being able to adjust the dimensions as parameters without the whole design falling apart, and yep, it does look similar the original because information technology fits the other original parts and, honestly, there just aren't a whole lot of other options to design a role that does the chore of holding a belt correct there and clamping down onto a section of tubing at the aforementioned fourth dimension. We'll really come up back to that later.
Then what followed on Twitter was 2 days of discussion betwixt Ryan and me of what is a derivative design and what is not, who holds copyright to what and what the morally right thing to do was.
Now, apparently, I don't think this part counts as a derivative pattern from the original MPCNC, but what Ryan kept pointing out is that he basically considers any part a derivative of the original as long every bit information technology fits onto the other parts because the dimensions and positions of features are the same every bit the original.
Then I was like, ok, if you're saying that any function that does the same job is a derivative, and that would require me to but release my design equally Creative Eatables Attribution Non-commercial, likewise, so so be it. Only then please exercise respect that license and don't utilize my original work commercially, either, including in derivatives. At present if we follow that line of thought, Ryan owns the copyright to this area, I own the copyright to that, and in the stop, nobody gets to utilize it. I thought belongings up a mirror would prove how ridiculous this entire matter would be, but instead Ryan accused me of wanting to destroy his MPCNC project. Similar, what?
So, simply to be clear, I started out by wanted to release my design with no restrictions for everyone to utilise, for the MPCNC customs and for whoever wants to make the part, there's besides an crawly community supporting this channel, so whenever I spend my time and pattern something, I want it to exist bachelor for equally many people as possible. And for me, that means releasing every bit open up-source. A not-commercial license isn't considered open-source because information technology comes with and so many restrictions in how you tin use a design, for example for educational apply, in a makerspace that, yes, usually has member fees, or in whatever other context where someone is making coin with it. For instance, me even edifice the MPCNC on this channel is a pretty grey area because I am "using" the parts in videos and livestreams that, at the end of the solar day, put nutrient on my table. Thankfully, I do have implicit permission in that case.
I have no intention of harming any projection that enables people to practice awesome things, in fact, I want the MPCNC to be every bit awesome every bit possible, which is why I started making modified parts in starting time place. But information technology looks similar, for the fourth dimension being, the MPCNC is going to be Ryan's project lonely, with him wanting control over the entire thing. And he obviously fabricated it pretty clear that he didn't want me "interfering" with that by making open up-source, compatible parts.
Now, there is withal that little detail in copyright where if a part only has a certain shape, because it has to do a certain job, copyright just doesn't apply to it. That's why, for instance, your car'south brake discs aren't protected past copyright from Ford or someone, because the shape they have is not "pattern" in the artsy way, it's purely function, and copyright merely applies to "fine art" and creative work in the widest sense.
I'm pretty sure that, aside from the MPCNC logo on here, these parts are very much only functional, too, then copyright really wouldn't hold up. I'm certain that all things considered, I did zip wrong, only I'thousand going to respect the fact that Ryan doesn't want this.
So that'due south what I'1000 going to exercise, unfortunately, this means I won't be spending any more fourth dimension on this MPCNC, the simply thing left to practice is to take this machine apart. I'chiliad sure I'll observe a new dwelling for the spindle, electronics and all that. Again, my intent was to brand the machine better, more flexible, more than attainable and of course I don't care if this chugalug clip thing makes it into the official design or even ends up being sold as the MPCNC. I mean, after all, this pattern was CC-0 to get-go. And that even includes use in projects with a restrictive license, as well.
You tin can support me without spending a single penny!

What Is A Good Size For Mpcnc,
Source: https://toms3d.org/2019/08/24/the-mpcnc-build-list/
Posted by: jenkinsneard1953.blogspot.com
0 Response to "What Is A Good Size For Mpcnc"
Post a Comment